Exhibition 

On the 15th of June, we had the opening night of our exhibition where families, friends, businesses and so on came along to view our work. 

My exhibition featured a lightbox with my negatives on them, and beside that was my two moving image pieces playing on a monitor along with the media students. 

The overall presentation of my project was strong and I liked the contrast between my negatives and positives; showing the process of my work from the start to finish. I think that the negatives worked really well with the lightbox and lit them up, making them strong and powerful visually. I’m very happy with my moving image also and found that seeing it on a larger scale made it so much more powerful. In conclusion, I am very happy with my exhibit however I feel that I would have preferred my moving image on a monitor by itself like on a Mac or small monitor. 

I am very happy with my exhibit and found that it fitted well with all the other work. 


Premiere Pro // Moving Image Piece

From my crit with Jo and Shaun, I have decided to created two moving image pieces with my photographs I produced in the darkroom. I found that this would be a good way to develop the images and transform them into something other than just photographs; it allowed me to be creative and experiment with movement once more, this time making the images physically move.

I went to the STEM building to start working with Jamie, and I brought the images I was using and the order to put them into when sequencing them into the movie.

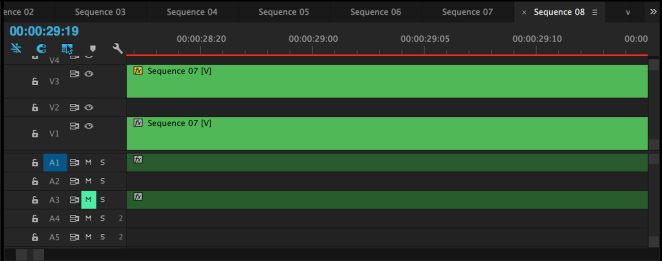
Jamie took the Jpegs and imported them into Adobe Premiere Pro CS6. I then showed him the sequence in which they went in and we sorted them out on the computer into the right order. From there I told Jamie what I wanted the clips to look like and how I wanted the images to look like; flickering images whilst it’s rolling. Jamie suggested more abstract effects to transform the images into an intricate and experimental moving image piece as he thought that the flicker wouldn’t be as effective.

For the first images, we put them into the order I had sorted with Jo and Shaun, from there we adjusted the amount of time each image would be shown. We started to experiment more; speeding up the time the images would be shown for and slowing them down as well as manipulating the images- enlarging them, reversing the sequence and repeating it again.

Screen Shot 2016-06-01 at 20.47.15.png

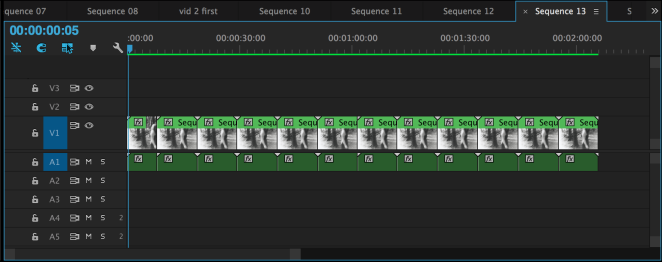
When we had edited and found the right sequence and effects to transform the photos into a moving image clip, we looked back at it. We felt that we could still add something to the film and Jamie felt that we could copy this sequence and then overlay it under the original sequence, but slowing it down so it was out of time with the original sequence. From watching this over, you could see the faint two layers which added dimension and depth to the moving image which I really liked about it and felt it improved a lot.

From there Jamie could see that something was missing so decided to add sound to add depth to it and bring it to life. From there he added a random song from the Mac- David Bowie and found segments which had unusual sounds like wind blowing and howling which seemed like an interesting choice. We overlapped the sound with the images and played it back; finding that this sound piece completely transformed the moving image and gave it a whole new style and outlook.

Screen Shot 2016-06-01 at 20.57.15

We played it over again to see if anything else needed adding but found that this final piece was finished and we didn’t see any other improvements that could be added.

Overall, I found that doing this first video and transforming my photographs into a moving image piece really changed the way I viewed my images and felt that it really transformed them into very sublime and elegant pieces that allowed me to develop my work and be creative, exploring new methods and working with new medias. It made me very excited for creating new moving images and felt it changed the way I portrayed my photographs.


I went onto producing the other moving image piece with the other images. We imported the images and placed them into a sequence. We then went onto manipulating the clip; speeding up certain aspects, slowing down some, repeating it and enlarging the images. We then repeated what we did in the previous clip and overlapped the clip with a duplicate clip to create layered images. We also thought that adding sound like last time would also improve it too so we added another David Bowie track to it with unusual sounds, as well as sounds from inside a moving car as it added more dimension and layers to the clip.

Screen Shot 2016-06-01 at 21.14.24.png

We yet again played it over to see whether there was any other improvements we could make but we found that this final edit was just right. We made the clip so that it was on a loop so it wouldn’t just end but keep going.

Overall, I found the second video was much more effective than the first one due to developing and adding more advanced transitions like reversing, and fading in and out. I found that this video had more depth in it as there were varieties of effects like reversing the sequence, changing the speed throughout, fading and overlapping images which made it more professional.

Generally, I felt that producing these moving images allowed me to be creative with my images and not just frame them or hang them like a photographer would typically do. It allowed me to go out of my comfort zone and go from producing a still image to a moving piece of art that I typically wouldn’t of thought of doing.

After producing these, Jamie and Brian gave me a couple of artists who I could look at that relate to my work- link below.

Artist Research for Moving Image Clip


Crit with Jo and Shaun

I had a crate with Jo and Shaun about how I could showcase my work and what I could do to develop it. Shaun told me that the images I had produced looked a lot like film reels of old films that flicker when moving so came to the conclusion of creating moving image mini films with these photographs.

Both Jo and Shaun helped me to determine which images to use and what order to put them in, and they came to a conclusion to produce two moving images with a section of images; some from my first shoot and some from my second shoot.

Jo went on to tell me to talk to Jamie about helping about with creating the mini movies as I am unfamiliar with movie software like Adobe Premier pro and he specialises in it.

Crit with Shaun

Today, I presented my work to my pathway and tutor Shaun. I explained the narrative behind my project and where it’s heading. He told me how it’s a good idea and he could see it doing far however, he felt I should look more into it and the processes behind it. He told me how the photographers had been working for years to develop it and craft the perfect photographs. We looked on the V&A website at camera-less photography and after the crit, I researched further into it.

I went onto the website so I could further into the process: http://www.vam.ac.uk/content/articles/c/camera-less-photography-techniques/ 


My Proposal Presentation

For my Final Major Project, I wanted to experiment more in the darkroom and with analogue photography as I am mainly digitally based. I looked through Pinterest and found some interesting work that focused mainly long exposure. Photographers like Dani Bickley and particularly Elena Oganesyan were artists which I found influential as well as another artist Nico Nordström and Kim Kim which had similar styles of black and white photography which were haunting and quite ghostly. This sort of imagery was something I wanted to incorporate into my work. I didn’t have a solid idea of what I wanted to do however, I knew I wanted to incorporate movement and long exposure into my project.

I created a presentation on Keynote which showed all the artists I had researched and found influential. I added notes to what I thought I could do for the project like movement, long exposure, experimentation through the darkroom. When I pitched my idea for my unit 7, I expressed how I wanted to go down the route of movement and gesture, as well as quite haunting imagery which I found interesting. The artist which I found really influential and who I wanted to incorporate her work into mine was Elena Oganesyan who I expressed my inspiration for. I talked about how I wanted to use female subjects to display femininity. My two tutors Shaun and Kim expressed the concern how I needed a narrative for my project so I came to the conclusion that I would focus on femininity how what women perceive femininity as- whether its elegance and poise of woman (the more stereotypical side of what a woman is) or whether its the realistic view of women which is feminism and empowerment. I wanted to go down the route of what people think femininity means to them and whether its the stereotypical view or more realistic view and express these views in my work.

My tutors thought that this concept was strong and could go very well, and Shaun said how I wouldn’t necessarily need an end product but rather just experiment and find an end piece whilst experimenting.

After the successful pitch, I ended up doing further research into artists which would fit into my project. I found some more artists, one in particular that I found interesting which was Taida Celi whose work was similar to Elena Oganesyan. The other artists were Miroslav Tichy and Saul Leiter. I want to produce work which is more fine art based photography and experimental.

Here is the powerpoint presentation in which I presented my proposal on- FMP

Here are screenshots of the slides-

Screen Shot 2016-03-14 at 21.26.37Screen Shot 2016-03-14 at 21.26.49Screen Shot 2016-03-14 at 21.26.57