Exhibition 

On the 15th of June, we had the opening night of our exhibition where families, friends, businesses and so on came along to view our work. 

My exhibition featured a lightbox with my negatives on them, and beside that was my two moving image pieces playing on a monitor along with the media students. 

The overall presentation of my project was strong and I liked the contrast between my negatives and positives; showing the process of my work from the start to finish. I think that the negatives worked really well with the lightbox and lit them up, making them strong and powerful visually. I’m very happy with my moving image also and found that seeing it on a larger scale made it so much more powerful. In conclusion, I am very happy with my exhibit however I feel that I would have preferred my moving image on a monitor by itself like on a Mac or small monitor. 

I am very happy with my exhibit and found that it fitted well with all the other work. 


Costings

Cameras:
Holga Camera: £25

Canon EOS 300 / EOS Rebel 2000 35mm Film Camera: £59.99

Film Rolls:

120 film 4 rolls: £18.99
35mm film: 4 rolls: £14.95
Milage for travelling to photography shoots:
My house (Deane to Heaton): 2.5 miles by car
Bolton to Edgworth: 5.9 miles by car
My house (Deane to Heaton): 2.5 miles by car
I researched the prices of what it would cost if I had to buy all the developing and processing accessories, photographic paper and darkroom kits.
Developing & Processing Accessories:
£60 tanks and reels
£12 cylinders for toners
£15 chemical storage bottles
£24 chemicals
£11 film clips (pack of 10)
Photographic paper: 
£21.21 Ilford Multigrade IV RC Deluxe 8 x 10, 25 Gloss Paper sheets

£22.99+ £3.95 delivery Ilford Multigrade IV RC Deluxe 5″ x 7″ 100 Sheets Glossy Paper

Darkroom equipment:
£150 neg carrier
£500 enlarger
£25 enlarger timer
£3.99 printing tongs
£17.82 x3 processing trays
£2 thermometer
£12 x3 bottles

£20.97 processing chemicals


Exhibiting my Work

When I had been allocated my space, I decided on how I would use it. My space was on an angle and I had came to a final idea of using a light box to display my work. My tutor drilled the light box into the wall, and from there I started to clean it as it had marks on, as well as retouch the border with white emulsion.

thumb_IMG_0827_1024.jpg

After I had cleaned the light box and touched it up, I started to get my final images and  arrange them into the right display.

thumb_IMG_0828_1024

I played around with the images, arranging them in different ways and fitting them together like a puzzle piece. I took all the images down and tried again to piece them together.

thumb_IMG_0828_1024

I included my negative films onto the light box also as it looked more effective and went well including my processes in my work other than the final photos.

thumb_IMG_0829_1024

After speaking with Jamie, he felt that just putting the negatives on would look better and would allow people to see the process of my work as it takes a lot of processes due to being analogue photography. We found that it would brighten up the space as having just the images on doesn’t look as powerful.

I pieced the images together to form a powerful and abstract composition. Fitting them together like a puzzle piece, I had to put up and remove film and then restart as they didn’t fit together. I was finally able to piece them all together after a few attempts and transform the light box into my exhibit space.

I went onto scotch tapping the negs onto the light box, finding this method of presenting my work a lot more effective. After that, I had decided to showcase my final images by displaying them above the light box however after consulting with Jamie and seeing the end result, I found it better to just leave the images and put them into a sketchbook.

I decided upon displaying my negs on the light box and my moving image pieces on the monitor as shown below.

IMG_0867.jpg

Overall, I am happy with the result of my exhibition space and I feel I have executed the space well and used it all successfully and in a professional manner. Even though it took a while and had me changing ideas and attempting different plans, I finally came up with a strong exhibition space that showcases my work effectively.


Studio // Exhibition Space

Day One / Two

In order to start putting up the walls and painting the studio, we needed to tidy the studio; getting rid of rubbish, old art, chairs, tables, materials and so on.

We went on to clearing tables and the sinks, stacking chairs and moving everything so we can start putting up the white walls and painting. Collectively, we all worked as a team assigning each other to different jobs and making sure that we got rid of everything that needed to go and moving others to different rooms.


Day Three / Four

We started to put the walls up and drill them together; filling holes and sanding uneven areas, and then painting the walls with white emulsion. I painted the walls where the sinks are using a roller to cover the holes and fix the marks on the wall. We put newspaper on the floor to make sure that white emulsion didn’t go on the floor.


I went on to applying sticky brown paper where there were gapes between the end and beginning of the walls. When the paper had dried, I applied a few layers of white emulsion to cover up the brown, then covered all the walls in white emulsion.

thumb_IMG_0500_1024


Day Five

The floors got cleaned by the cleaners which meant that marks were left on the bottom of the walls resulting in them needing to be painted over again, however overall the exhibition space is very nearly done!

We needed to allow the paint to dry, apply more layers and then when they’re dry remove the paper from the floor. Whilst that’s being done, we started to move the chairs, ladders, paint pots, bags and so on.

Day 8

We’ve started to put the exhibition work up and figure out what looks best by moving things around and seeing what looks effective. It has taken a few days to do this; hanging garments, fabric, putting light boxes up, framing work; working with out surroundings and collaborating to produce a high quality exhibit space.

thumb_IMG_0866_1024


We have managed to transform this white open space into a high quality exhibit which showcases everyone’s work in a professional manner, working with everyone’s work and piecing them together so that they fit and convert into a well executed space.


Exhibition Space Prep: Research

After having a tutorial with Jo on how I should present my images, we came to this conclusion;

  • Use originals images; I scanned my images and reprinted them but all the same size as Jamie had recommended that concept to me as he thought it may look more effective. This idea didn’t work out as well as using my original images and I felt that it would make my exhibit more authentic using the real images, and the variety of scales would look more interesting.
  • Display the images in a more creative and perhaps three dimensional manner- not just framing them or hanging them on the white exhibition wall.
  • Research photography exhibitions on Pinterest to find inspiration; hang images on string with bull dog clips or put the images on lightboxes.

When I had finished the tutorial, I went home and researched further into different methods for displaying my images. I looked on Pinterest and searched things like lightbox photography displays and photography exhibitions. Below are some ideas and artists I had found:


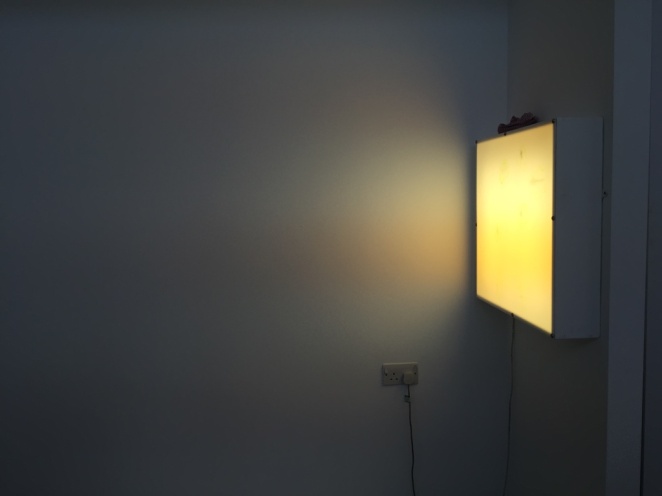
Tris Vonna-Michell: Use of Light boxes and Projection 

I liked this idea of displaying images. I find the use of light in art is a powerful tool and can manipulate the image and meaning. I think using a lightbox to exhibit my images would be an effective way and I feel that it will highlight and capture the imagery effectively in the photographs. I found that juxtaposing the natural light in the photos with artificial light that the lightbox produces would make for an interesting appearance.

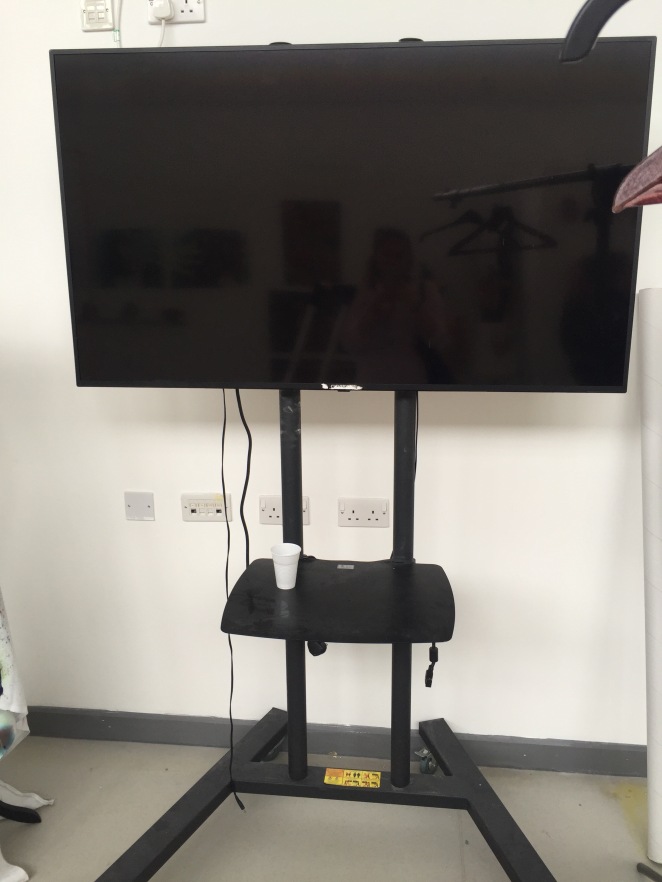
I looked more into the use of light boxes in photography exhibitions and found some examples on Pinterest.


I liked the diverse ways you could use light boxes or even just light. These methods are very effective and like the outcome it creates. I feel that these ideas are too big however and wouldn’t fit in the exhibition space that I have; especially taking into consideration everyone else in the exhibition so these displays wouldn’t work. Although these ways wouldn’t work, I could still use them as inspiration to create a smaller exhibit that is influenced by this research.

I found other artist exhibitions who used light which I found interesting.

imperial war musuem manc

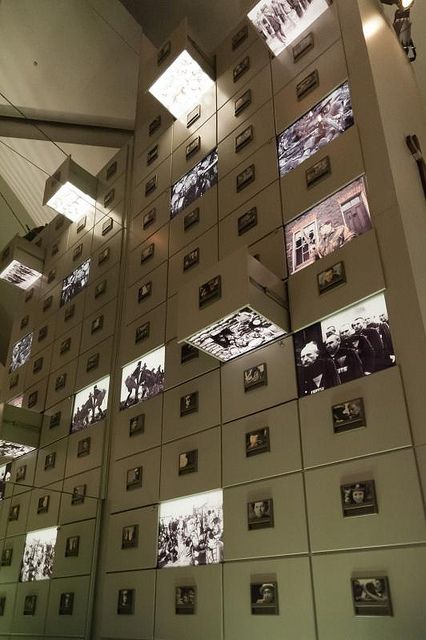
Imperial War Museum, Manchester.

karl laferfeld on the little black jacket

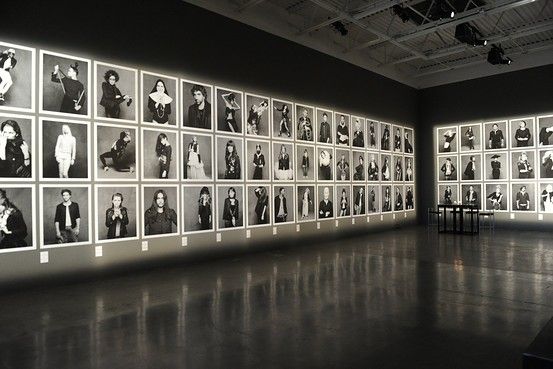
Karl Lagerfeld on the Little Black Jacket

Snapshot Memento: Scenography for a Photography Exhbition

Below is the link to the page which describes the ideas and concepts for this photography exhibition and the process which took place in developing the exhibition space.

http://www.designboom.com/readers/snapshot-memento-scenography-for-a-photography-exhibition/


I went on to looking at other methods for displaying photographs in exhibits. Another way was hanging images or using string to connect them all together.

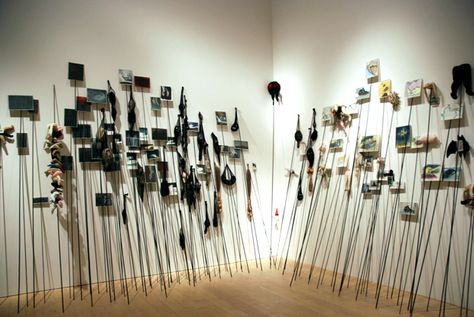
I looked at an artist called Annette Messager who focused on close ups of different body parts and then hanging at different levels and overlaying them over one another , almost connecting the different body parts together.


I find this concept effective and I really like this idea. I feel that this method would work really well with my images as overlapping them and hanging them at different levels would be really interesting, however it wouldn’t be as big of a scale as this.

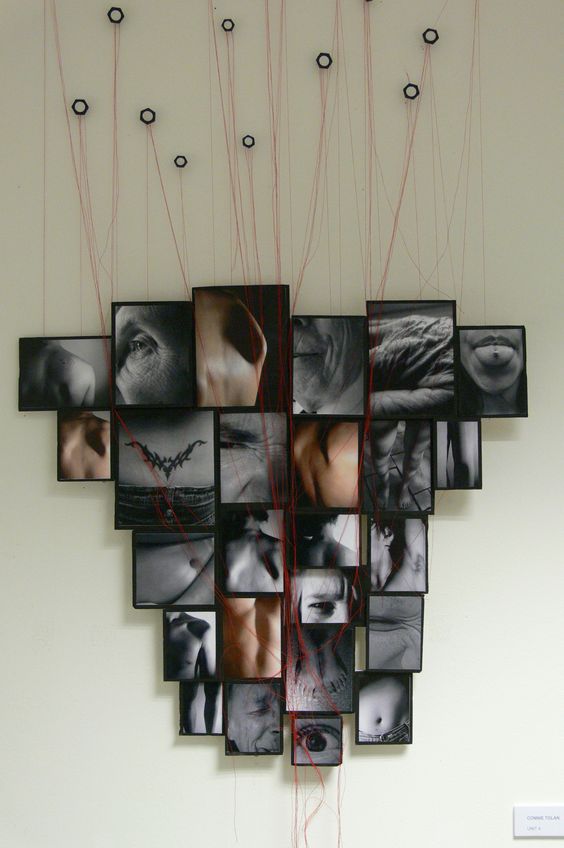
I found other methods that she’s displayed her images using string as well.


e87dbcb1453eef2ee25d1f7e125ea78b

05acd44c9e68811819db1ad2b44727de

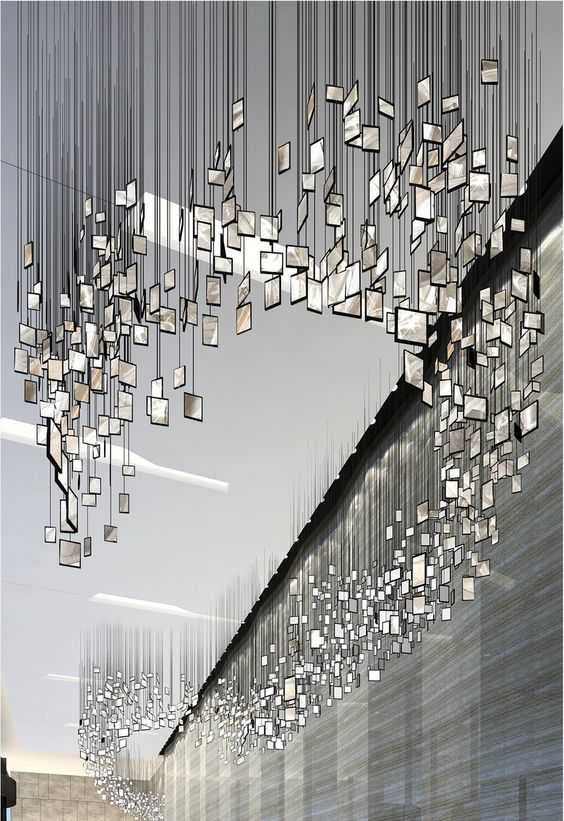
I feel that this method above is an effective way to display photographs; printing the images on acetate so when you look from different angles, you can see right through the image instead of it being blank on one side. I feel that using a different material like acetate is an effective method to exhibiting your photos.

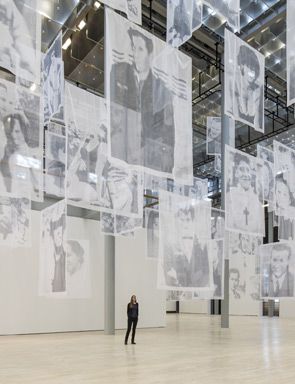
I had also found photos printed onto transparent fabric which was an interesting way also. This method is very effective and unconventional for displaying photographs as they are usually exhibited on high quality paper.

04c4e374f4bb91feda344fb74574db88

I found other ways of using string to display photographs and found these different methods.

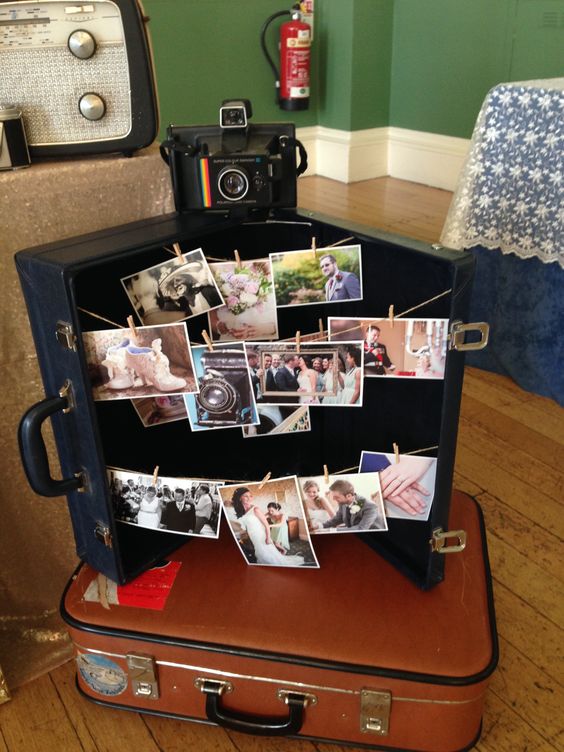
Hanging string like a washing line and clipping the images on using bull dog clips and pegs.


Hanging images using string.


More abstract way of hanging images.

4c2e03d06120216c76e0460f0656287b


I found these different methods interesting and the presentation very effective in exhibiting photographs. I find these ways influential and will be considered when thinking of how to present my photographs. I like the idea of hanging photographs from clothing lines and pinning them with bulldog clips or pegs.

I also found a photographer called Chloe Ostmo who produced an installation “Falling” of two dimensional images re-inserted into a three dimensional series showing a woman falling down the stairs hence the title “Falling”. She produced the work for her degree show at Brighton University in 2006.


I found more alternate ways of hanging photographs which I found interesting.

fa85035de806263e39b88eed69dcb4fa

I thought that this was an interesting concept, and seemed more unconventional than just hanging photos. I found it to be a nice idea however, I felt that it may not be suitable for my images.

5f85633b450ddc3ea66eb81879387a9d

I liked this method also, I think that this would work well with my project as I have incorporated nature and the environment in my work, so using a branch would be an interesting concept.


I found other displays also like using wooden blocks to attached the photographs to which I really liked and found it effective, however it seemed too much like something you would put in your home not in an exhibition.


I also found a series of bulldog clips attached to a wall with Cyanotype images which I found effective.

5019124cd6fd5f2d885bd1ea62dfac9c


My images are different scales in terms of paper size; 6×4, 5×7 and 10×8 which meant that making an uneven grid of different scaled images would be visually interesting.

d95630d1f29630daa9f181e1af963bd8


Overall, I found the light box and string ideas most interesting and appropriate for my exhibition and I am thinking of how I could incorporate either one or both of them into my exhibit space.


Artist Process

I had been researching long exposure as I have never experimented with the method. I chose to email some photographers which I found inspirational but couldn’t find information about them. One photographer I emailed was called Elena Oganesyan which can be found through this link-https://chloeoliverfmp.wordpress.com/2016/02/28/elena-oganesyan/ 

She emailed me back on the 11/03/16 which inspiring words which helped to get to know her work ethic. She also told me that her website is under construction which means once it’s finished, there will be more information on her and her work.

Screen Shot 2016-03-14 at 21.11.40

This helped me to know more about her images however- it didn’t give much information into her process, but her website, once finished will give me more guidance.


Artist Research- Elena Oganesyan

Screenshots taken from Pitch Powerpoint 

This slideshow requires JavaScript.

Screen Shot 2016-02-23 at 10.15.56

Screen Shot 2016-02-23 at 10.15.36.png

I was looking on Pinterest for artist influence and came across this artist; Elena Oganesyan whose work I instantly fell in love with. I wanted to experiment with traditional photography and create abstract pieces of photography. When I saw her images, I knew exactly what I wanted to do. I chose the concept of femininity and what people view femininity as, which I would portray in my experimental images.

I went onto a website called http://www.artlimited.net/4693?tabid=0 which showed Elena’s work with her personal details on which people could contact her on with any queries.

Screen Shot 2016-02-28 at 19.24.53

I decided to contact Elena on her gmail account as there isn’t much information about Elena and her artwork. I sent her an email asking her about the processes she uses to produce her work and asked about why she chose photography as a profession.

Screen Shot 2016-02-28 at 19.18.53

Now I am just waiting for a reply from her.

I have also found her site which gives me more images that I can take influence from; https://500px.com/elena_oganesyan