Exhibition 

On the 15th of June, we had the opening night of our exhibition where families, friends, businesses and so on came along to view our work. 

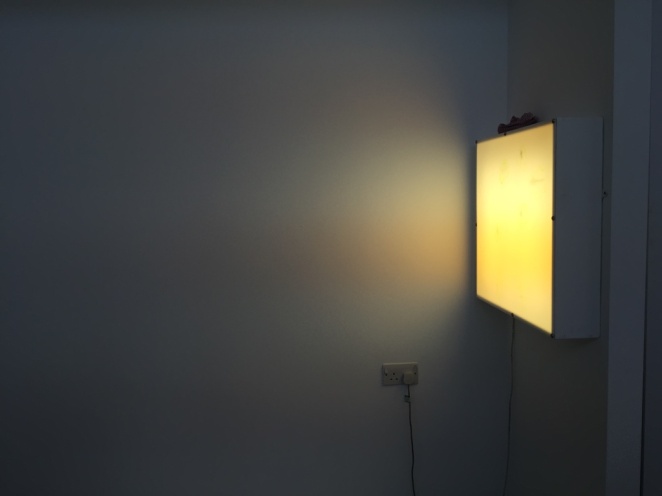
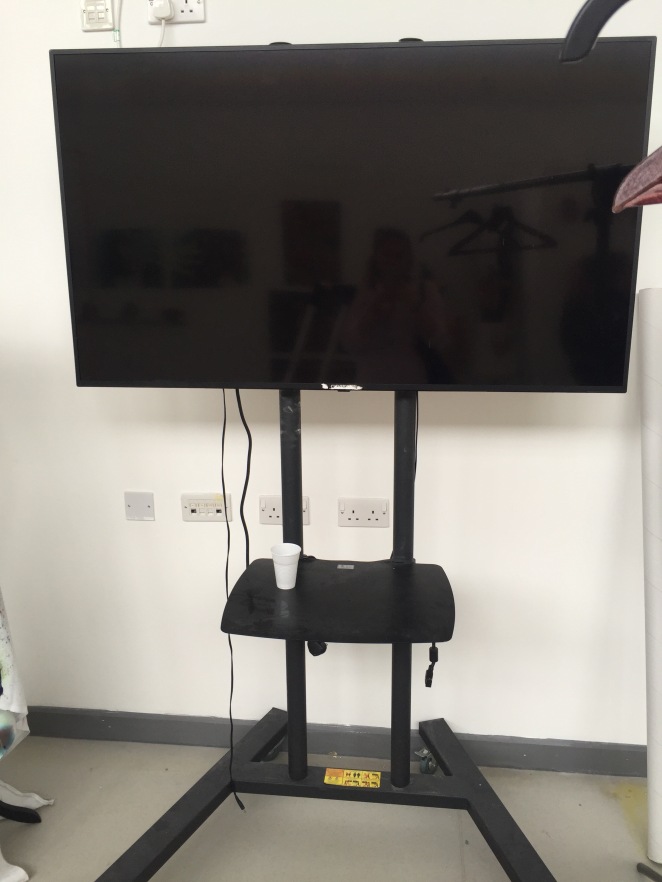
My exhibition featured a lightbox with my negatives on them, and beside that was my two moving image pieces playing on a monitor along with the media students. 

The overall presentation of my project was strong and I liked the contrast between my negatives and positives; showing the process of my work from the start to finish. I think that the negatives worked really well with the lightbox and lit them up, making them strong and powerful visually. I’m very happy with my moving image also and found that seeing it on a larger scale made it so much more powerful. In conclusion, I am very happy with my exhibit however I feel that I would have preferred my moving image on a monitor by itself like on a Mac or small monitor. 

I am very happy with my exhibit and found that it fitted well with all the other work. 


Evaluation of FMP

For my Final Major Project, I wanted to work more with analogue photography and experiment in the darkroom as I am more digitally based. I researched different photographers on Pinterest and found some interesting work that focused mainly on long exposure. I decided that I wanted to concentrate on movement, using long exposure as my medium. I decided to look at femininity and how it is stereotypically and realistically portrayed and capture this through photography. I came across photographers likes Elena Oganesyan who I found would be particularly influential as well as other photographers like Taida Celi and Miroslav Tichy. I found artists whose work were quite haunting and ghostly like Nico Nordström and Kim Kim and found interesting to incorporate.

I went onto producing work with 35mm and 120 film, photographing my friend’s movement with different format film. My friend’s had practiced ballet when they were younger, so this was an interesting concept to introduce into my work and photograph them whilst they created ballet poises. I tried more abstract ways of photographing my friends so that the negatives would be more interesting; thus working with different methods like moving the camera and changing the angles. I went onto processing the negatives and then developing them into positive images in the darkroom.

I started to experiment more in the darkroom, using different materials and methods to produce more contemporary, creative pieces. I scratched into the negative film as well as applied different materials like masking tape and thread on top of it to produce more distorted and textured imagery. I applied water to the paper to form ripples on the photos and moved the paper in a variety of ways to form different effects and motions.

I decided to show the artistic process of my work in my images as well as marks and fingerprints to show the craft of my photographs. I found that a lot of work wasn’t visually strong as they were more experimental so only a small quantity were part of my final project. I scanned my images in as I wanted to try and change the colour to make them more vibrant like Elena Oganesyan and Taida Celi’s work. I found that this development worked well and the different colours created very interesting compositions however, they weren’t as strong as my original photographs.

After developing the photographs, my tutors suggested creating moving image pieces to develop my work, so I produced two moving images using Adobe Premiere Pro. I found that going down this route and using a different medium made my project stronger and more powerful. I feel that it is a creative tool that has helped to develop and strengthen my project.

I was initially heading down the route of just producing photographs that were inspired by photographers like Elena Oganesyan and creating a collection of images to hang up on the wall for the exhibit. However, I needed up producing moving images with these photographs which I find is much stronger and has developed my work a lot more. Even though it didn’t meet my original intentions, I feel that it is much more improved and visually stronger than my original goal.

Overall, I feel that this project has gone well and even though it hasn’t gone in the direction it was initially intended on going in, my work has become a lot stronger because of it. I have found that the images produced is what I wanted them to look like in the end which I

am happy about, however I did wish that some of the images were in colour like photographer Elena Oganesyan had done with her photographs. I feel that colour may have made my images more striking and bold. When experimenting on Photoshop the images I changed from black and white to colour looked very vibrant and lucid which I found fit my project and incorporated some of Oganesyan’s style into it. I found I was getting somewhere with my images when changing the hue however, they weren’t as strong as the originals. Apart from that, I found that this project overall has been a success and has come out better than expected; especially with the moving image piece which I find has made my project even more powerful and creative. Finally, I feel I have develop my skills more and expanded my knowledge on analogue photography which was one of the initial aims of this project, and whilst doing that I have created experimental pieces and developed them in moving images.

Ideas for Holga Camera

I decided to look at what I could do to create experimental images and look what ways I could use the Holga to create visually strong images. I went onto the Lomography website and looked through the Holga 120 CFN guide to experimentation.

Long Exposure

The camera allows you to create long exposure  using the “b” setting. This is something which I will be using to portray movement of women, and capturing obscure and abstract motions through the lens. I wanted to capture something that conventional photography does not which is why I bought this camera and am deciding to use the long exposure setting on it.

Double Exposure

The camera also allows you to create double exposure, which means that you expose your film twice to the light. It’s a great way to produce creative and abstract imagery which is something that I am looking for in my work. This will allow me to develop my skills and expand my knowledge.

Other possibilities

You are able to make multiple exposures or endless panoramic shots with your Holga 120 CFN which is what I like as it allows me to be able to have endless possibilities in which I can capture my subjects. 


I’m really excited to try out these new skills as I have never experimented with analogue photography before and really want to try working with long and double exposure.


Costings

Cameras:
Holga Camera: £25

Canon EOS 300 / EOS Rebel 2000 35mm Film Camera: £59.99

Film Rolls:

120 film 4 rolls: £18.99
35mm film: 4 rolls: £14.95
Milage for travelling to photography shoots:
My house (Deane to Heaton): 2.5 miles by car
Bolton to Edgworth: 5.9 miles by car
My house (Deane to Heaton): 2.5 miles by car
I researched the prices of what it would cost if I had to buy all the developing and processing accessories, photographic paper and darkroom kits.
Developing & Processing Accessories:
£60 tanks and reels
£12 cylinders for toners
£15 chemical storage bottles
£24 chemicals
£11 film clips (pack of 10)
Photographic paper: 
£21.21 Ilford Multigrade IV RC Deluxe 8 x 10, 25 Gloss Paper sheets

£22.99+ £3.95 delivery Ilford Multigrade IV RC Deluxe 5″ x 7″ 100 Sheets Glossy Paper

Darkroom equipment:
£150 neg carrier
£500 enlarger
£25 enlarger timer
£3.99 printing tongs
£17.82 x3 processing trays
£2 thermometer
£12 x3 bottles

£20.97 processing chemicals


Premiere Pro // Moving Image Piece

From my crit with Jo and Shaun, I have decided to created two moving image pieces with my photographs I produced in the darkroom. I found that this would be a good way to develop the images and transform them into something other than just photographs; it allowed me to be creative and experiment with movement once more, this time making the images physically move.

I went to the STEM building to start working with Jamie, and I brought the images I was using and the order to put them into when sequencing them into the movie.

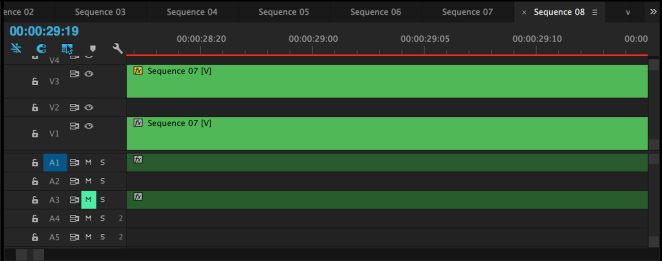
Jamie took the Jpegs and imported them into Adobe Premiere Pro CS6. I then showed him the sequence in which they went in and we sorted them out on the computer into the right order. From there I told Jamie what I wanted the clips to look like and how I wanted the images to look like; flickering images whilst it’s rolling. Jamie suggested more abstract effects to transform the images into an intricate and experimental moving image piece as he thought that the flicker wouldn’t be as effective.

For the first images, we put them into the order I had sorted with Jo and Shaun, from there we adjusted the amount of time each image would be shown. We started to experiment more; speeding up the time the images would be shown for and slowing them down as well as manipulating the images- enlarging them, reversing the sequence and repeating it again.
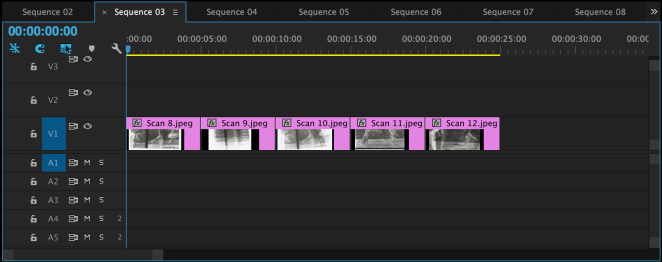
Screen Shot 2016-06-01 at 20.47.15.png

When we had edited and found the right sequence and effects to transform the photos into a moving image clip, we looked back at it. We felt that we could still add something to the film and Jamie felt that we could copy this sequence and then overlay it under the original sequence, but slowing it down so it was out of time with the original sequence. From watching this over, you could see the faint two layers which added dimension and depth to the moving image which I really liked about it and felt it improved a lot.

From there Jamie could see that something was missing so decided to add sound to add depth to it and bring it to life. From there he added a random song from the Mac- David Bowie and found segments which had unusual sounds like wind blowing and howling which seemed like an interesting choice. We overlapped the sound with the images and played it back; finding that this sound piece completely transformed the moving image and gave it a whole new style and outlook.
Screen Shot 2016-06-01 at 20.57.15

We played it over again to see if anything else needed adding but found that this final piece was finished and we didn’t see any other improvements that could be added.

Overall, I found that doing this first video and transforming my photographs into a moving image piece really changed the way I viewed my images and felt that it really transformed them into very sublime and elegant pieces that allowed me to develop my work and be creative, exploring new methods and working with new medias. It made me very excited for creating new moving images and felt it changed the way I portrayed my photographs.


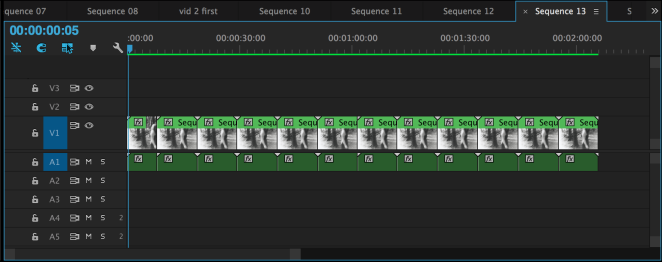
I went onto producing the other moving image piece with the other images. We imported the images and placed them into a sequence. We then went onto manipulating the clip; speeding up certain aspects, slowing down some, repeating it and enlarging the images. We then repeated what we did in the previous clip and overlapped the clip with a duplicate clip to create layered images. We also thought that adding sound like last time would also improve it too so we added another David Bowie track to it with unusual sounds, as well as sounds from inside a moving car as it added more dimension and layers to the clip.
Screen Shot 2016-06-01 at 21.14.24.png

We yet again played it over to see whether there was any other improvements we could make but we found that this final edit was just right. We made the clip so that it was on a loop so it wouldn’t just end but keep going.

Overall, I found the second video was much more effective than the first one due to developing and adding more advanced transitions like reversing, and fading in and out. I found that this video had more depth in it as there were varieties of effects like reversing the sequence, changing the speed throughout, fading and overlapping images which made it more professional.

Generally, I felt that producing these moving images allowed me to be creative with my images and not just frame them or hang them like a photographer would typically do. It allowed me to go out of my comfort zone and go from producing a still image to a moving piece of art that I typically wouldn’t of thought of doing.

After producing these, Jamie and Brian gave me a couple of artists who I could look at that relate to my work- link below.

Artist Research for Moving Image Clip


Artist Research for Moving Image Clip

Anne Brigman

Anne Brigman, born in 1869 was a photographer who built her career photographing herself and friends nude in locations with natural beauty like at the edge of cliffs with broken trees overlooking natural landscapes. Herself and her friends showed dramatic and theatrical movement, almost dance like and with a free spirit.

After she photographed these photos which emulated the style of paintings, Brigman altered and enhanced her images through the art of drawing with pencils and paints. Her work is best known for being taken in California’s Sierra Nevada mountains which  in the early 1900s were inaccessible, taking a lot of dedication from Brigman to climb with all her equipment; seven pound 4×5 camera, a heavy wooden tripod, a number of photographic plates, as well as supplies and gear for an extensive stay.

Brigman wrote an article for Camera Craft magazine in 1929 after she had become an established photographer, in which she described her relationship with one such tree. “One day on one of my wanderings I found a juniper – the most wonderful juniper that I’ve met in my eighteen years of friendship among them…It was a great character like the Man of Gallilee or Moses the Law-giver, or the Lord Buddha, or Abraham Lincoln…Storm and stress well borne made it strong and beautiful. I climbed into it. Here was the perfect place for a figure; here the place for the right arm to rest, and even though my feet were made clumsy by boots, I could see and feel where the feet would fit perfectly into the cleft that went to its base.”

I found that my work related a lot to Brigman’s in the way that my images have a fine line between poetry, and paintings and early photography like Anne Brigman’s photographs. Our work are both very sublime and elegant, capturing nature and spiritual imagery.


Eadweard Muybridge

“Eadweard Muybridge was the man who famously proved a horse can fly. Adapting the very latest technology to his ends, he proved his theory by getting a galloping horse to trigger the shutters of a bank of cameras. This experiment proved indisputably for the first time what no eye had previously seen – that a horse lifts all four hooves off the ground at one point in the action of running. Seeking a means of sharing his groundbreaking work, he invented the zoopraxiscope, a method of projecting animated versions of his photographs as short moving sequences, which anticipated subsequent developments in the history of cinema.”                                                                                                                         -http://www.tate.org.uk/whats-on/tate-britain/exhibition/eadweard-muybridge

Eadweard Muybridge is known as one of the most influential photographers of all time, pushing the limits of the camera’s possibilities. He created the world famous images of animals and humans in motion. Muybridge’s reputation as a photographer grew in the late 1800s as he had captured movement in a way that had never been done before. His work was used by both scientists and artists.


My tutor Jamie suggested Muybridge to me because of his work with motion which is something that I have been doing and that my moving image clips resemble; the first movie I created looked as if a girl was doing a cart wheel with the different shots I captured. Muybridge’s work resembles mine very much and is very influential and fitting for my project due to his moving images.

Overall these two artists, although are very different, both fit into my project and the moving images I have produced due to the styles and manner in which I have showcased my work. Anne Brigman, although doesn’t work with motion works with femininity and beauty which is what I portray in my images and Ed Muybridge who works with animals, mainly focuses on motion which is what I incorporate into not just my photographs through long exposure but the moving images I have produced.


Crit with Jo and Shaun

I had a crate with Jo and Shaun about how I could showcase my work and what I could do to develop it. Shaun told me that the images I had produced looked a lot like film reels of old films that flicker when moving so came to the conclusion of creating moving image mini films with these photographs.

Both Jo and Shaun helped me to determine which images to use and what order to put them in, and they came to a conclusion to produce two moving images with a section of images; some from my first shoot and some from my second shoot.

Jo went on to tell me to talk to Jamie about helping about with creating the mini movies as I am unfamiliar with movie software like Adobe Premier pro and he specialises in it.

Exhibiting my Work

When I had been allocated my space, I decided on how I would use it. My space was on an angle and I had came to a final idea of using a light box to display my work. My tutor drilled the light box into the wall, and from there I started to clean it as it had marks on, as well as retouch the border with white emulsion.

thumb_IMG_0827_1024.jpg

After I had cleaned the light box and touched it up, I started to get my final images and  arrange them into the right display.

thumb_IMG_0828_1024

I played around with the images, arranging them in different ways and fitting them together like a puzzle piece. I took all the images down and tried again to piece them together.

thumb_IMG_0828_1024

I included my negative films onto the light box also as it looked more effective and went well including my processes in my work other than the final photos.

thumb_IMG_0829_1024

After speaking with Jamie, he felt that just putting the negatives on would look better and would allow people to see the process of my work as it takes a lot of processes due to being analogue photography. We found that it would brighten up the space as having just the images on doesn’t look as powerful.

I pieced the images together to form a powerful and abstract composition. Fitting them together like a puzzle piece, I had to put up and remove film and then restart as they didn’t fit together. I was finally able to piece them all together after a few attempts and transform the light box into my exhibit space.

I went onto scotch tapping the negs onto the light box, finding this method of presenting my work a lot more effective. After that, I had decided to showcase my final images by displaying them above the light box however after consulting with Jamie and seeing the end result, I found it better to just leave the images and put them into a sketchbook.

I decided upon displaying my negs on the light box and my moving image pieces on the monitor as shown below.

IMG_0867.jpg

Overall, I am happy with the result of my exhibition space and I feel I have executed the space well and used it all successfully and in a professional manner. Even though it took a while and had me changing ideas and attempting different plans, I finally came up with a strong exhibition space that showcases my work effectively.


Studio // Exhibition Space

Day One / Two

In order to start putting up the walls and painting the studio, we needed to tidy the studio; getting rid of rubbish, old art, chairs, tables, materials and so on.

We went on to clearing tables and the sinks, stacking chairs and moving everything so we can start putting up the white walls and painting. Collectively, we all worked as a team assigning each other to different jobs and making sure that we got rid of everything that needed to go and moving others to different rooms.


Day Three / Four

We started to put the walls up and drill them together; filling holes and sanding uneven areas, and then painting the walls with white emulsion. I painted the walls where the sinks are using a roller to cover the holes and fix the marks on the wall. We put newspaper on the floor to make sure that white emulsion didn’t go on the floor.


I went on to applying sticky brown paper where there were gapes between the end and beginning of the walls. When the paper had dried, I applied a few layers of white emulsion to cover up the brown, then covered all the walls in white emulsion.

thumb_IMG_0500_1024


Day Five

The floors got cleaned by the cleaners which meant that marks were left on the bottom of the walls resulting in them needing to be painted over again, however overall the exhibition space is very nearly done!

We needed to allow the paint to dry, apply more layers and then when they’re dry remove the paper from the floor. Whilst that’s being done, we started to move the chairs, ladders, paint pots, bags and so on.

Day 8

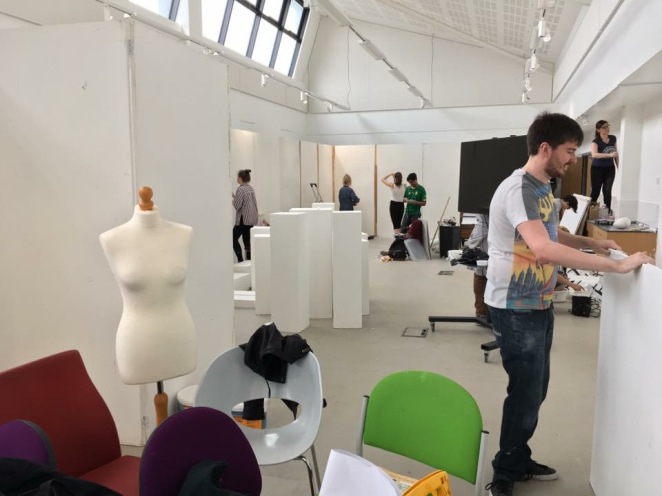
We’ve started to put the exhibition work up and figure out what looks best by moving things around and seeing what looks effective. It has taken a few days to do this; hanging garments, fabric, putting light boxes up, framing work; working with out surroundings and collaborating to produce a high quality exhibit space.

thumb_IMG_0866_1024


We have managed to transform this white open space into a high quality exhibit which showcases everyone’s work in a professional manner, working with everyone’s work and piecing them together so that they fit and convert into a well executed space.